Tuesday, February 24, 2015

Setting up the JBoss Server

JBoss Server Setup:

          In this tutorial we would be moving through on how to setup the JBoss Server and how to configure the JBoss Eclipse Plugin in Eclipse.

Step 1:

     Download JBOSS Enterprise Application Platform Installer from http://www.jboss.org/products/eap/download/


The Installer download would be in the form of jar.

Step 2:
        
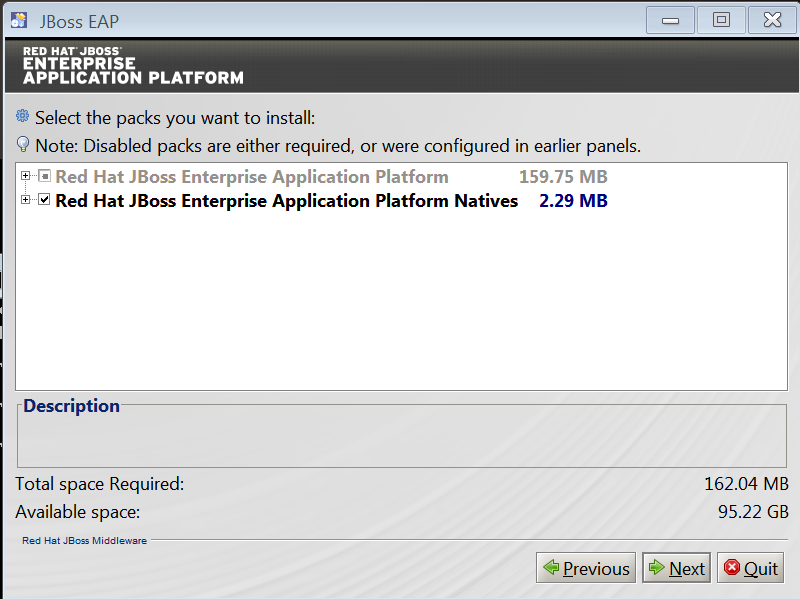
    Now let's install the downloaded jar component as below


Step 3: Proceed through the below SnapShots to complete the Installation


Note: Hit the URL http://localhost:9990/console/ and test if the installation is successfull.

Step 4: Now let's install the Eclipse JBoss Server Plugin by navigating to Help-> Install -> New Software -> Set Work with as http://download.jboss.org/jbosstools/updates/stable/kepler/ -> Under Java Web and Java EE Development , Pick JBOSSAs Tools


Once the installation of JBossAs Tools is done, you could find the options for starting, debugging the JBoss Server at the Eclipse Tool Bar as below. 


Note: From the version 8.0, JBossAs has been renamed as JBossWildFly8.0

Step 5: Setup a Web Project in Eclipse. Configure a RunTimeServer and run the project in Server. Done !!

[ Note: At times, when we attempt to run the Project in JBoss Server, we get the error as java.net.BindException


What happens here is that, JBoss is attempting to run the project at local server with port 8080. But already some application is utilizing the port 8080. Hence the JBoss can't get access to that. Hence we get the error message as address already in use.

We can overcome this by navigating to JBoss EAP Installation Directory -> Standalone -> Configuration -> standalone.xml -> Update <socket-binding name="http" port="8080"/> to <socket-binding name="http" port="8081"/>

Sunday, February 15, 2015

Hibernate Tutorial using Gradle Build System

Hibernate Tutorial using Gradle Build Tool

In this Tutorial, we'll be walking through on how to setup the Hibernate Project using Gradle Build System.

Step1: File -> New -> Other -> Gradle Project -> Give the name for the Project -> Finish.


Step2 : Our Project Structure would be now looking as below


Step 3: Now let's start with the creation of Config File (.cfg.xml) at src/main/resources directory along with the Hibernate Configuration Console (this helps in validating our connection against db)

      i) .cfg.xml Creation
   
      Select src/main/resources/org/gradle directory -> Right Click -> Hibernate Configuration File -> Give the name for .cf.xml -> Click Next and we will get the Window. Fill the Connection details as below. 
        

           We ought to make sure if Create Console Configuration option is checked at bottom as shown in picture above -> Click Next

         ii) Console Configuration Creation

           Once we click Next in above Window, we'll be taken towards another dialog to fill in the details for Console Configuration as shown below:

            In the Main Tab, provide the Hibernate Version value as 4.0 and proceed to Options Tab.   
          

         In the Options Tab, provide the Database Dialect value as Oracle 10g and move to Classpath Tab.


      In the Classpath Tab, click the button Add External jar and add the ojdbc jar as below and click Finish


Step 4: We gonna save objects into the Table named person having a column named id. So Let's create a POJO named Person with a variable named id.

Step 5: Now Let's create a Mapping Xml .hbm.xml. Select the directory src/main/resource/org/gradle -> Right Click -> New -> Other -> Hibernate XML Mapping File -> Next-> Add Class -> Add Up the POJO created in step 5.


Step 6: Now we ought to make an entry in .cfg.xml for the .hbm.xml. Select the .cfg.xml ->Select Session Factory Tab at bottom -> Select  Mapping -> Click Add Button -> Add the POJO.


How do we test if our mapping are right?

Select Hibernate Configurations Tab -> Select the Project -> Database -> Look for the Table which was mapped -> Right Click Table -> Select HQL Editor ->

Execute the Query as

           select id from person 

                    It would normally throw error as
                   Error
                   Fri Feb 13 15:59:12 IST 2015
                  org.hibernate.hql.internal.ast.QuerySyntaxException: person is not mapped [select                            count(p) from person p]

                 The reason is that w.r.t HQL, we should use the POJO names and not the actual table                          names.
                 Now reexecute the Query as and it would execute fine
          select id from Person 
        
Step 7: Create a Main Entry Class  i.e class with public static void main(){}

Step 8: Now time to make entries in Gradle to complete the Project Setup

   i) Include the reference for the Hibernate Dependencies.
     
  •  org.hibernate:hibernate-gradle-plugin:4.3.8.Final -> Includes three vital Components - group:name: version. Hence it should be included in the gradle build file as below:


   ii) Refer the entries for the ojdbc jars as below.
  • Make a directory named libs under main project directory and place the jdbc jar within. The structure should now be looking as below

  • Now refer the jdbc jar from build.gradle as compile files(libs/jdbc.jar) under dependency section as below         

  iii) Now load the dependencies specified in the gradle file by navigating through Select Project -> Right Click -> Gradle -> Refresh Dependencies.


  iv) Specify the Entry Point of the Application. This helps in executing the jars build by Gradle as the build System knows which is the Entry Point for the Application.


   v) Specify that while building up the Jar export all the dependency jar Files along with. This helps in running the application smooth.


Step 9: Now place the below source code at org/gradle/TestHibernate
public static void main(String[] args) {
// TODO Auto-generated method stub
  Configuration conf = new Configuration().configure("org/gradle/hibernate.cfg.xml");
ServiceRegistry serviceRegistry = new StandardServiceRegistryBuilder().applySettings(conf.getProperties()).build();
SessionFactory sf = conf.buildSessionFactory(serviceRegistry);
Session session = sf.openSession();
Person p = new Person(1111);
//p.setId(3421);
session.persist(p);
org.hibernate.Transaction transact = session.beginTransaction();
transact.commit();
session.close();
System.out.println("Done");
}

In the above snippet the relative path for .cfg.xml is given as
Configuration conf = new Configuration().configure("org/gradle/hibernate.cfg.xml");
How our Application detects this path?
Select Project -> Right Click -> Properties -> Build Path -> you can find the resources directory added to the Class Path 


Hence the path for directories within src/main/resources directory or java directory is specified as org/gradle/hibernate.cfg.xml

Step 10: Build the Project using Gradle and once done execute the jar file using the below command

E:\Workspace\KeplerWorkspace\SampleHibernate\build\libs>java -jar SampleHibernat
e-1.0.jar

Hurrah ! We did it !
                                                                                         

Saturday, February 14, 2015

Setting up Hibernate Project in Eclipse

Hibernate Project in Eclipse

Overview

          We'll walk through on how to set up the Hibernate Project in Eclipse.

Setting up the Environment

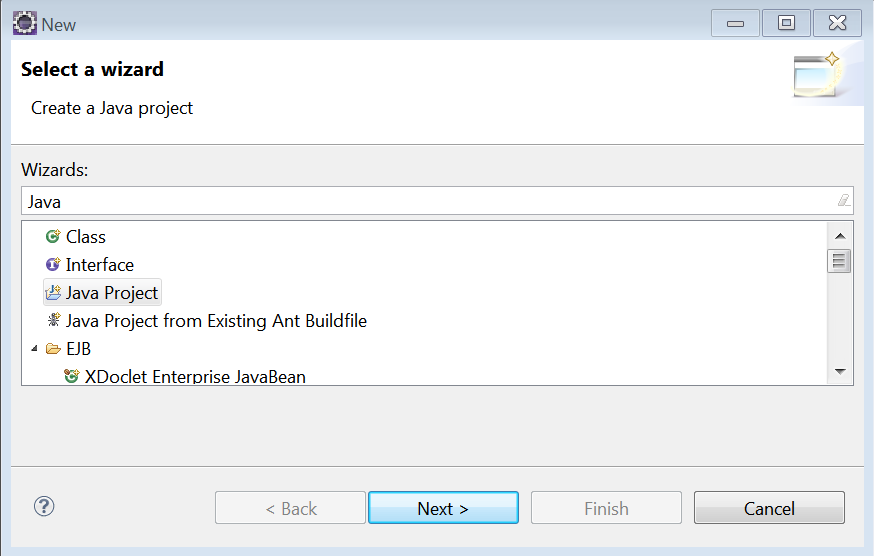
Step1 :  File -> New -> Other -> Java Project


Step2: Provide the Java path Name


Step 3: Now let's add the required Project Libraries. Right click the project -> Properties -> Java Build Path -> Libraries -> Add External Jars  and include the Hibernate related Jar Files ( Note: Hibernate related jar files can be obtained from http://hibernate.org/orm/downloads/ . Include all the jars within lib/required directory  in the zip) . 


Step 4 : Include the Ojdbc jar as well.


Step 5: Set up the Entry point for the Application by creating the class named TestHibernate with public static void main(String args) and once done, the project structure should be looking as below


Step 6: Let's now create a folder named conf under SampleHibernateProject to place the .cfg.xml and .hbm.xml files. 


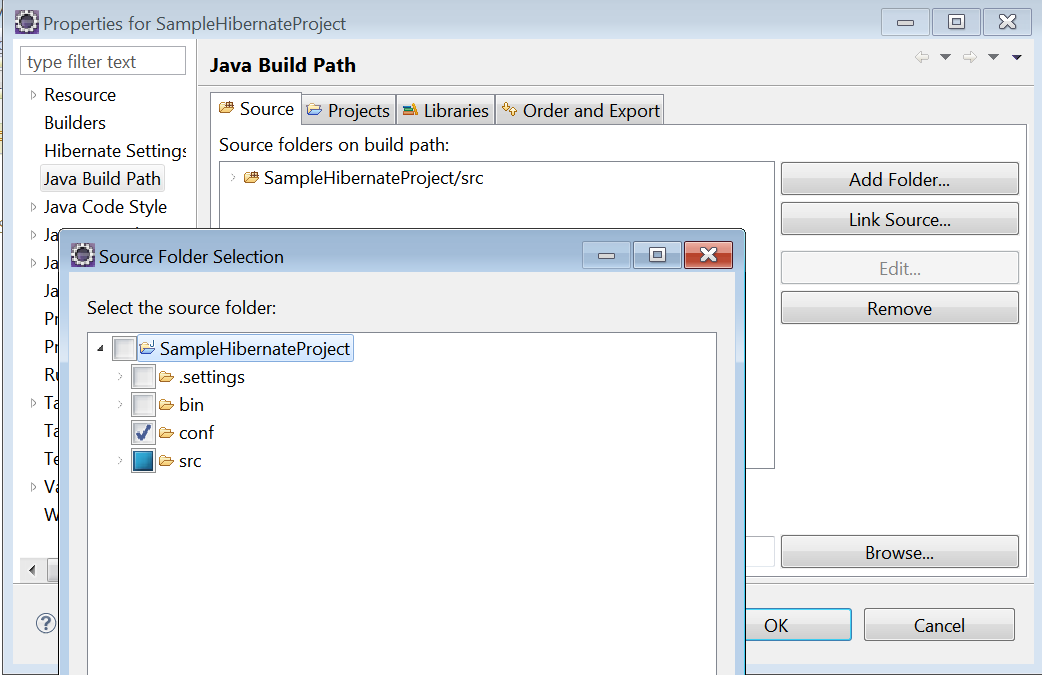
Step 7: Add the created folder conf to the ClassPath. Project -> Right Click-> Properties -> Build Path-> Source -> Add Folder -> Select Conf.


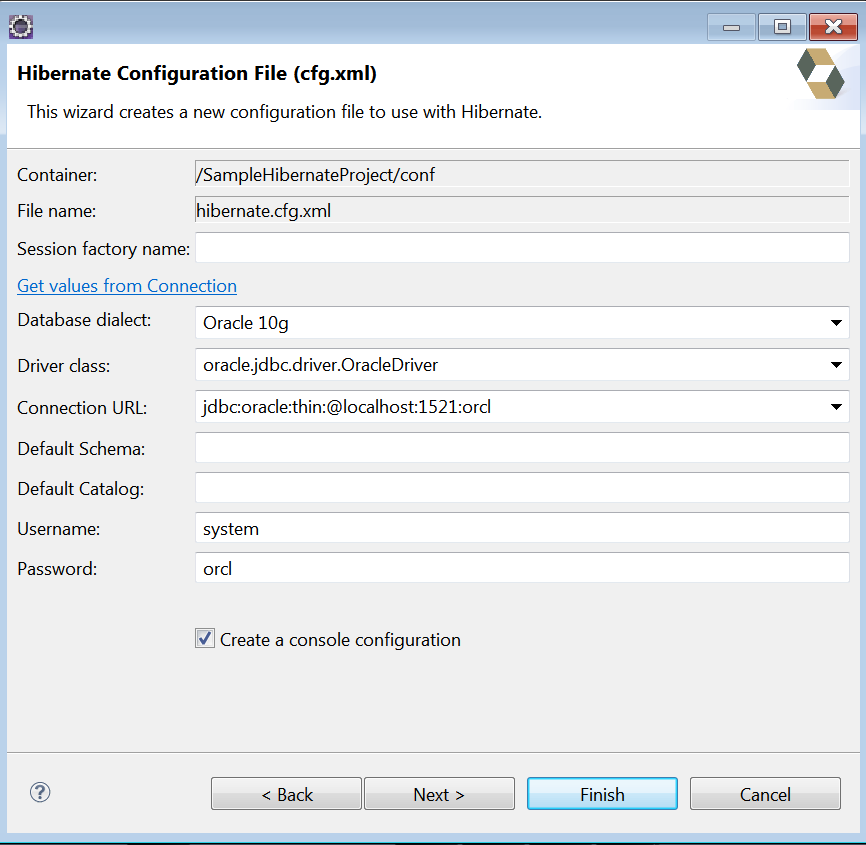
Step 8: Let's create the Configuration file .cfg.xml in conf directory. Right click conf directory-> New -> Other -> Hibernate Configuration File -> Provide the Name for .cfg.xml -> Click Next -> Provide the Connection Details as below and Click Next


[Note: since the Create a Console Configuration has been checked in above pic, we are being directed towards creating a Hibernate Configuration Console which helps in validating the connection details provided in the pic above ]

        In the Hibernate Console Config creation , change the Hibernate version to the Latest in the Main Tab and proceed to the optionsTab.


         In the Options Tab, provide the Dialect and proceed to Classpath tab.


[Note: Oracle 10g Dialect is compatible with Oracle 11g DB. We could use Oracle 11g Dialect but it is not officially supported when this post has been created]

          In the Classpath, provide the JDBC Driver as below  and click OK


[Note: Dialect in general means locally Used Language. Dialects in Hibernate helps primarily in converting the HQL to the Native SQL Queries and executing them against the DB]

[Note:  In case if hibernate.cfg.xml becomes unable to be parsed, we would have to replace

<!DOCTYPE hibernate-configuration PUBLIC "-//Hibernate/Hibernate Configuration DTD 3.0//EN"
                                         "http://hibernate.sourceforge.net/hibernate-configuration-3.0.dtd">

with

<!DOCTYPE hibernate-configuration SYSTEM 
    "classpath://org/hibernate/hibernate-configuration-3.0.dtd">]

Step 9: We gonna save the data to a table named person having a column named id. Hence let's have the Pojo created named Person with id as one of its property.

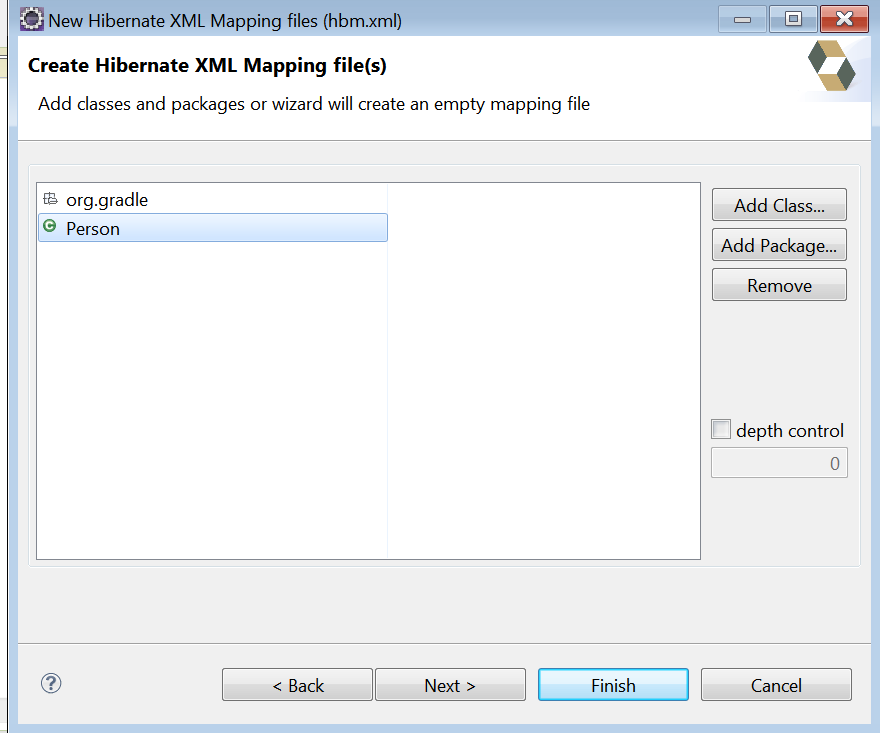
Step 10:  Lets's create a Hibernate Mapping File that maps the DB Table person with the above POJO created named Person. Select Conf Folder -> Right Click -> New -> Other -> Hibernate XML Mapping File -> Click Add Class and add the POJO as below -> Click Finish.


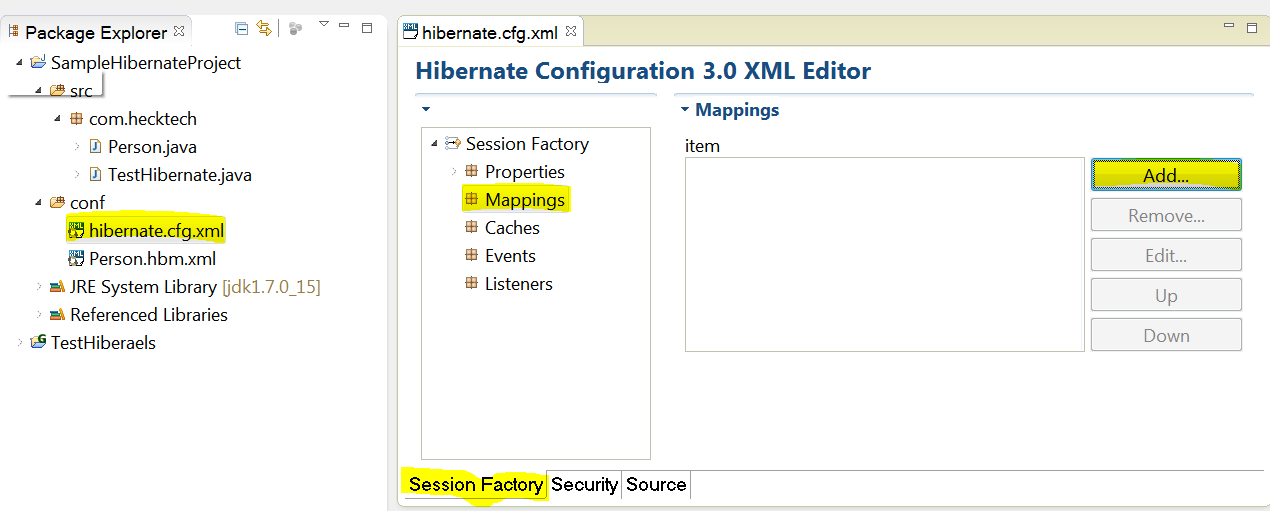
Step 11:  Now Let's refer the .hbm.xml created above in our hibernate.cfg.xml created in Step 8. Open hibernate.cfg.xml-> Select Sesison Factory Tab at bottom-> Selection Mapping -> Click Add


                Browse for the Pojo Class and resource .hbm.xml to be mapped. Click Finish.


Step 12: Now place the below snippet in void main and run the Project.

public static void main(String[] args) {
// Instantiate the Configuration to provide the Path
Configuration conf = new Configuration().configure("hibernate.cfg.xml");
//Instanstiate the ServiceRegistry
ServiceRegistry serviceRegistry = new         StandardServiceRegistryBuilder().applySettings(conf.getProperties()).build();
//Utilize the instance of Configuration and SessionRegistry to create a SessionFactory
SessionFactory sessFact = conf.buildSessionFactory(serviceRegistry);
//Open the Session with sessionFactory
Session session = sessFact.openSession();
//Create an Object to be persisted in DB
Person person = new Person(3456);
//Setup a Transaction 
Transaction transact = session.beginTransaction();
//persisit the object in the Session
session.persist(person);
//Save the object persisted in the Session
transact.commit();
System.out.println("Done");
}

Step 13: The Code gets executed with the Warning Message as of below:

To avod this warning replace <session-factory name=""> as <session-factory> in hibernate.cfg.xml.
The Warning would go Off. We are done. Hurrah !!

Monday, February 9, 2015

Hibernate Architechture and Hibernate Eclipse Plugin Setup

Introduction to Hibernate

History of Hibernate
  • Gavin King along with his Colleagues started developing an ORM Framework - Hibernate at Cirrus Technologies. 
  • JBoss Inc after acquiring Cirrus, hired those lead Hibernate developers for further development of it. 
  • Although Red Hat took over JBoss Inc. later, developments related to Hibernate are still preserved at JBOSS sites rather than RedHat.
  • Hibernate Framework  can be located at http://hibernate.org/orm/downloads/
  • Hibernate related tools for Development (Eg. Hibernate Plugin - Part of JBOSS  Tools) can be looked up at http://tools.jboss.org/downloads/overview.html

Hibernate Architechture

Hibernate Architechture can be partitioned into 4 layers.
    • Application Layer
    • Hibernate Layer
    • JDBC Layer
    • DB Layer

Hibernate Eclipse Plugin Setup

  •  Hibernate Eclipse Plugin makes the Life of Developer much easier by providing the  Hibernate Configuration Console for establishing the DB Connection, HQL Editor for executing HQL queries against DB to check if our mappings are right, Hibernate Query Result to view the result, Hibernate Mapping Diagrams - Diagram representation of Mapping, Hibernate Reverse Engineering for generating all hibernate related stuff (.cfg.xml,.hbm.xml, POJO) from. reverse.xml, 

tools.jboss,org

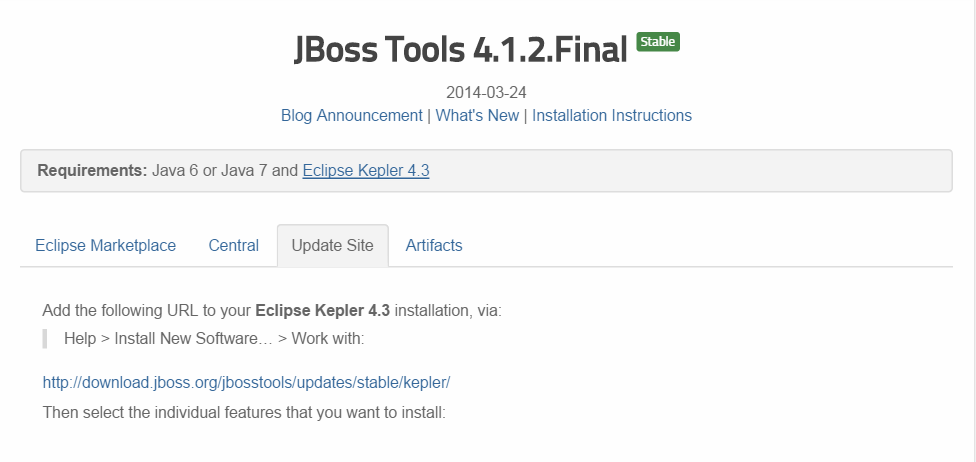
Once we click the JBOSS Tools 4.1.2.Final, we can find that there are multiple ways of installing the JBOSS Tools Plugin as below like getting from Market Place, Zipping as Artifacts,Getting from Update Site.

    Getting from URL Provided.

  • Make a note of the URL provided at the Update Site Tab
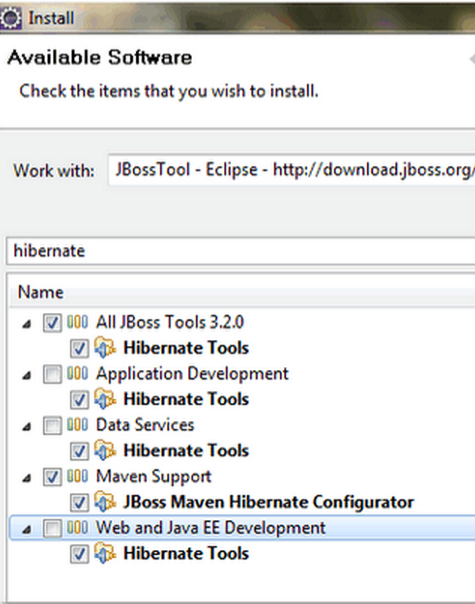
  •  Eclipse -> Help -> Install New Software -> Provided the URL which was got as above. Type Hibernate to get only the Hibernate related Entities and install only them. Restart once done.

   Getting From Eclipse Market Place

  • Drag Drop the Eclipse Install Icon provided in the UI once MarketPlace Tab is clicked.
  •     Select the Hibernate Tools and JBOSS Maven Hibernate Configurator. Click confirm. Restart Once done.


     Zipping As Artifact

  • If we wish to get the Hibernate Tools or the Entire JBoss Tools as Artifact, we need to click the Artifacts tab shown in below picture.
  • Once downloaded, Unzip the contents and copy paste the contents from plugins/features directory to respective plugin/features directories of Eclipse. Once done Restart Eclipse.

Hibernate Installation Validation

  • Windows -> Open Prespective -> Other. 
  • Hibernate prespective should be listed as below.